HALLOWEEN PARTY 2010
Well I have started to think about this years party, and much to all the kids (young and old) disappointment, I have decided not to throw a big Halloween party this year (see Halloween party 2009 for ideas).
BUT have a pumpkin carving party instead, as they are older now so can hopefully carve the pumpkins themselves without cutting any fingers off. So instead of the 25 + people we had over last year (the number increases every year) we are just having afew friends around and children and adults will carve together, and have some food and a family fun this year.
I have bought some school craft aprons as they are quite cheap. Although I am thinking of dying them black, as the pumpkin flesh stains, and at least then the aprons can be again.
I already have a large box of the kids carving tools (there are lots of kits available cheap), also a lino tool, and several different sized small pieces of copper pipes (they are great for making eye holes etc). Lots of metal ice cream scoops and large metal spoons. A large bottle of talcum powder, will let you know why soon.
And to prolong the life of the carving Vaseline (petroleum jelly).
Must remember to save lots of old newspapers and buy some black bags and baby wipes. Also photocopy lots of the carving patterns, there are loads of free patterns over the Internet you can use.
PUMPKIN CARVING PATTERNS
You can try these sites but there are lots more:
http://www.pumpkinmasters.com/free_patterns_main.asp
http://www.dltk-holidays.com/halloween/mpatterns.htm
Pumpkin masters are the best at this, and have a new book of patterns ever year, they are American but you can buy them in this country.
DECORATIONS
Pumpkins, Pumpkins and More Pumpkins!!!
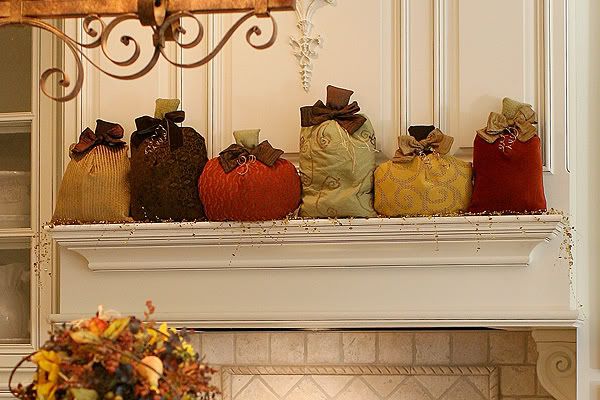
Fabric Pumpkins

Wire Pumpkins

Carved Pumpkins.
Painted Pumpkins.
Decoupaged Pumpkins.
Willow Pumpkins

Tin Pumpkins.
pCm(T7!BMiKPnS(E!~~_35.JPG)
Big ones, small ones and way they come ones.
I already have a large box of the kids carving tools (there are lots of kits available cheap), also a lino tool, and several different sized small pieces of copper pipes (they are great for making eye holes etc). Lots of metal ice cream scoops and large metal spoons. A large bottle of talcum powder, will let you know why soon.
And to prolong the life of the carving Vaseline (petroleum jelly).
Must remember to save lots of old newspapers and buy some black bags and baby wipes. Also photocopy lots of the carving patterns, there are loads of free patterns over the Internet you can use.
PUMPKIN CARVING PATTERNS
You can try these sites but there are lots more:
http://www.pumpkinmasters.com/free_patterns_main.asp
http://www.dltk-holidays.com/halloween/mpatterns.htm
Pumpkin masters are the best at this, and have a new book of patterns ever year, they are American but you can buy them in this country.
DECORATIONS
Pumpkins, Pumpkins and More Pumpkins!!!
Fabric Pumpkins

Wire Pumpkins

Carved Pumpkins.
Painted Pumpkins.
Decoupaged Pumpkins.
Willow Pumpkins

Tin Pumpkins.
Big ones, small ones and way they come ones.
CUPCAKES

More Pumpkins, LOL
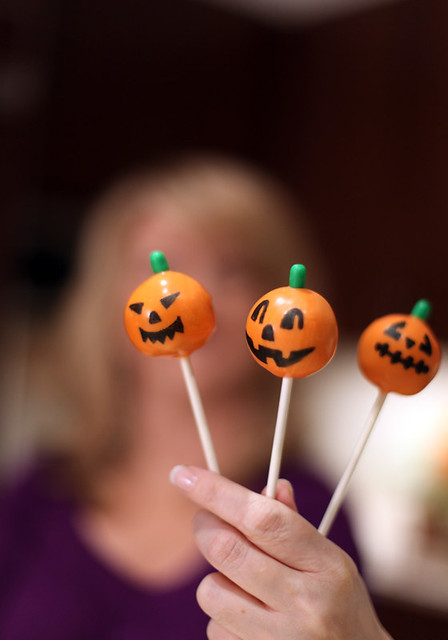
I am going to make cake pops instead of cupcakes this year.
check out bakerella.com for intrusctions.
You make a cake, you crumble it, mix the cake with icing, roll it into balls, freeze them then cover in chocolate. They are so morish!!!
GAMES AND ACTIVITIES
The main part will be the pumpkin carving
but I have had requests for a treasure and a couple more games so here's what I have been thinking about.
RING THE PUMPKIN
Line up three large pumpkins with stems, to form a ring toss.
Use embroidery hoops or make hoops with rope and duct tape.
Mark a throwing line on the floor and take turns trying to ring a pumpkin stem. It doesn't matter if the players make a "ringer" or not, reward them with small prizes or stickers.
Smaller children can attempt to ring an entire large pumpkin with a hula hoop.
GOURD SKITTLES
Use butternut squash as pins.
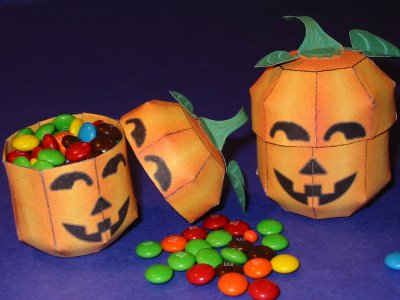
FAVOUR BOXES

Free printable pumpkin boxes here
~*~*~*~*~*~*~*~*~*~*~*~*~*~*~*~*~*~*~*~*~*~*~
Carving Instructions
Step 1) Preparation
For easy cleanup, place your pumpkin on several layers of newspaper before carving.
Step 2) Draw and Cut Lid
Cut a six-sided lid, big enough so you can reach in and clean out all the pumpkin gunk. Angle a saw or knife toward the center of the pumpkin to create a ledge that supports the lid. Make sure the hole is large enough to reach in and pull out the seeds and stringy membrane. The bottom of the pumpkin could also be cut off instead; this will allow the pumpkin to sit up straight and make removing the seeds easier.
Step 3) Clean and Scrape
Using the flat-edged ice cream scoop or the special pumpkin scoop, clean out the seeds and strings. Where you plan to carve, scrape the pumpkin wall until it's about one inch thick. If carving a challenging pattern, scrape the pumpkin so that the wall is about one-half inch thick.
Step 4) Print and Attach Pattern
Select the pattern you want to carve. Tape it in place with masking tape (normal sellotape doesn't stay on)
The pattern may need to be slightly folded to fit on a rounded pumpkin. Fold the pattern so that the pattern lines match up. (If the pattern is too large or too small, you can use a copier to reduce or enlarge)
Step 5) Transfer Design
Using the poker tool, poke holes along the design lines.
Check to see you have transferred the design completely, then take the pattern off the pumpkin.
And cover design in talc and rub it into the holes. This makes the design clearer for carving.
Step 6) Saw Design
Using the carving saws saw dot-to-dot using a gentle up and down motion. Saw gently, the saws can break if they are forced.
Liam's finish pumpkin
And mine....I don't know where he get's his weird sense of humour from mind.
To preserve your pumpkin you can cover the raw cut edges with Vaseline or use a spray on clear vanish.
~*~*~*~*~*~*~*~*~*~*~*~*~*~*~*~*~*~*~*~*~*~*~


No comments:
Post a Comment
Let me know what do you think?